What you can do with Conference mode
Conference mode turns a live recording into a full-screen caption display built for events. Use it at talks, conferences, and company events to:- Show live captions in large type on the venue screen
- Let the audience scan a QR code and read captions on their own phones
- Display real-time translated captions for international attendees
- Hand off the recording afterward, when the link the audience watched becomes the full transcript page
Conference mode works on the web and the desktop app. You can only turn it on from a live recording whose [Listen In] language is set to [Multilingual], and it appears only while a recording is in progress.
How to start Conference mode
Start a multilingual live recording
When you start a live recording, set the [Listen In] language to [Multilingual]. If it is set to another language, the Conference mode button stays disabled and you see the note “Available only when recording in Multilingual.”
Turn on Conference mode
Tap the [Conference Mode] button at the top of the recording note to switch to the full-screen caption display. Send this screen to the venue projector or a second monitor.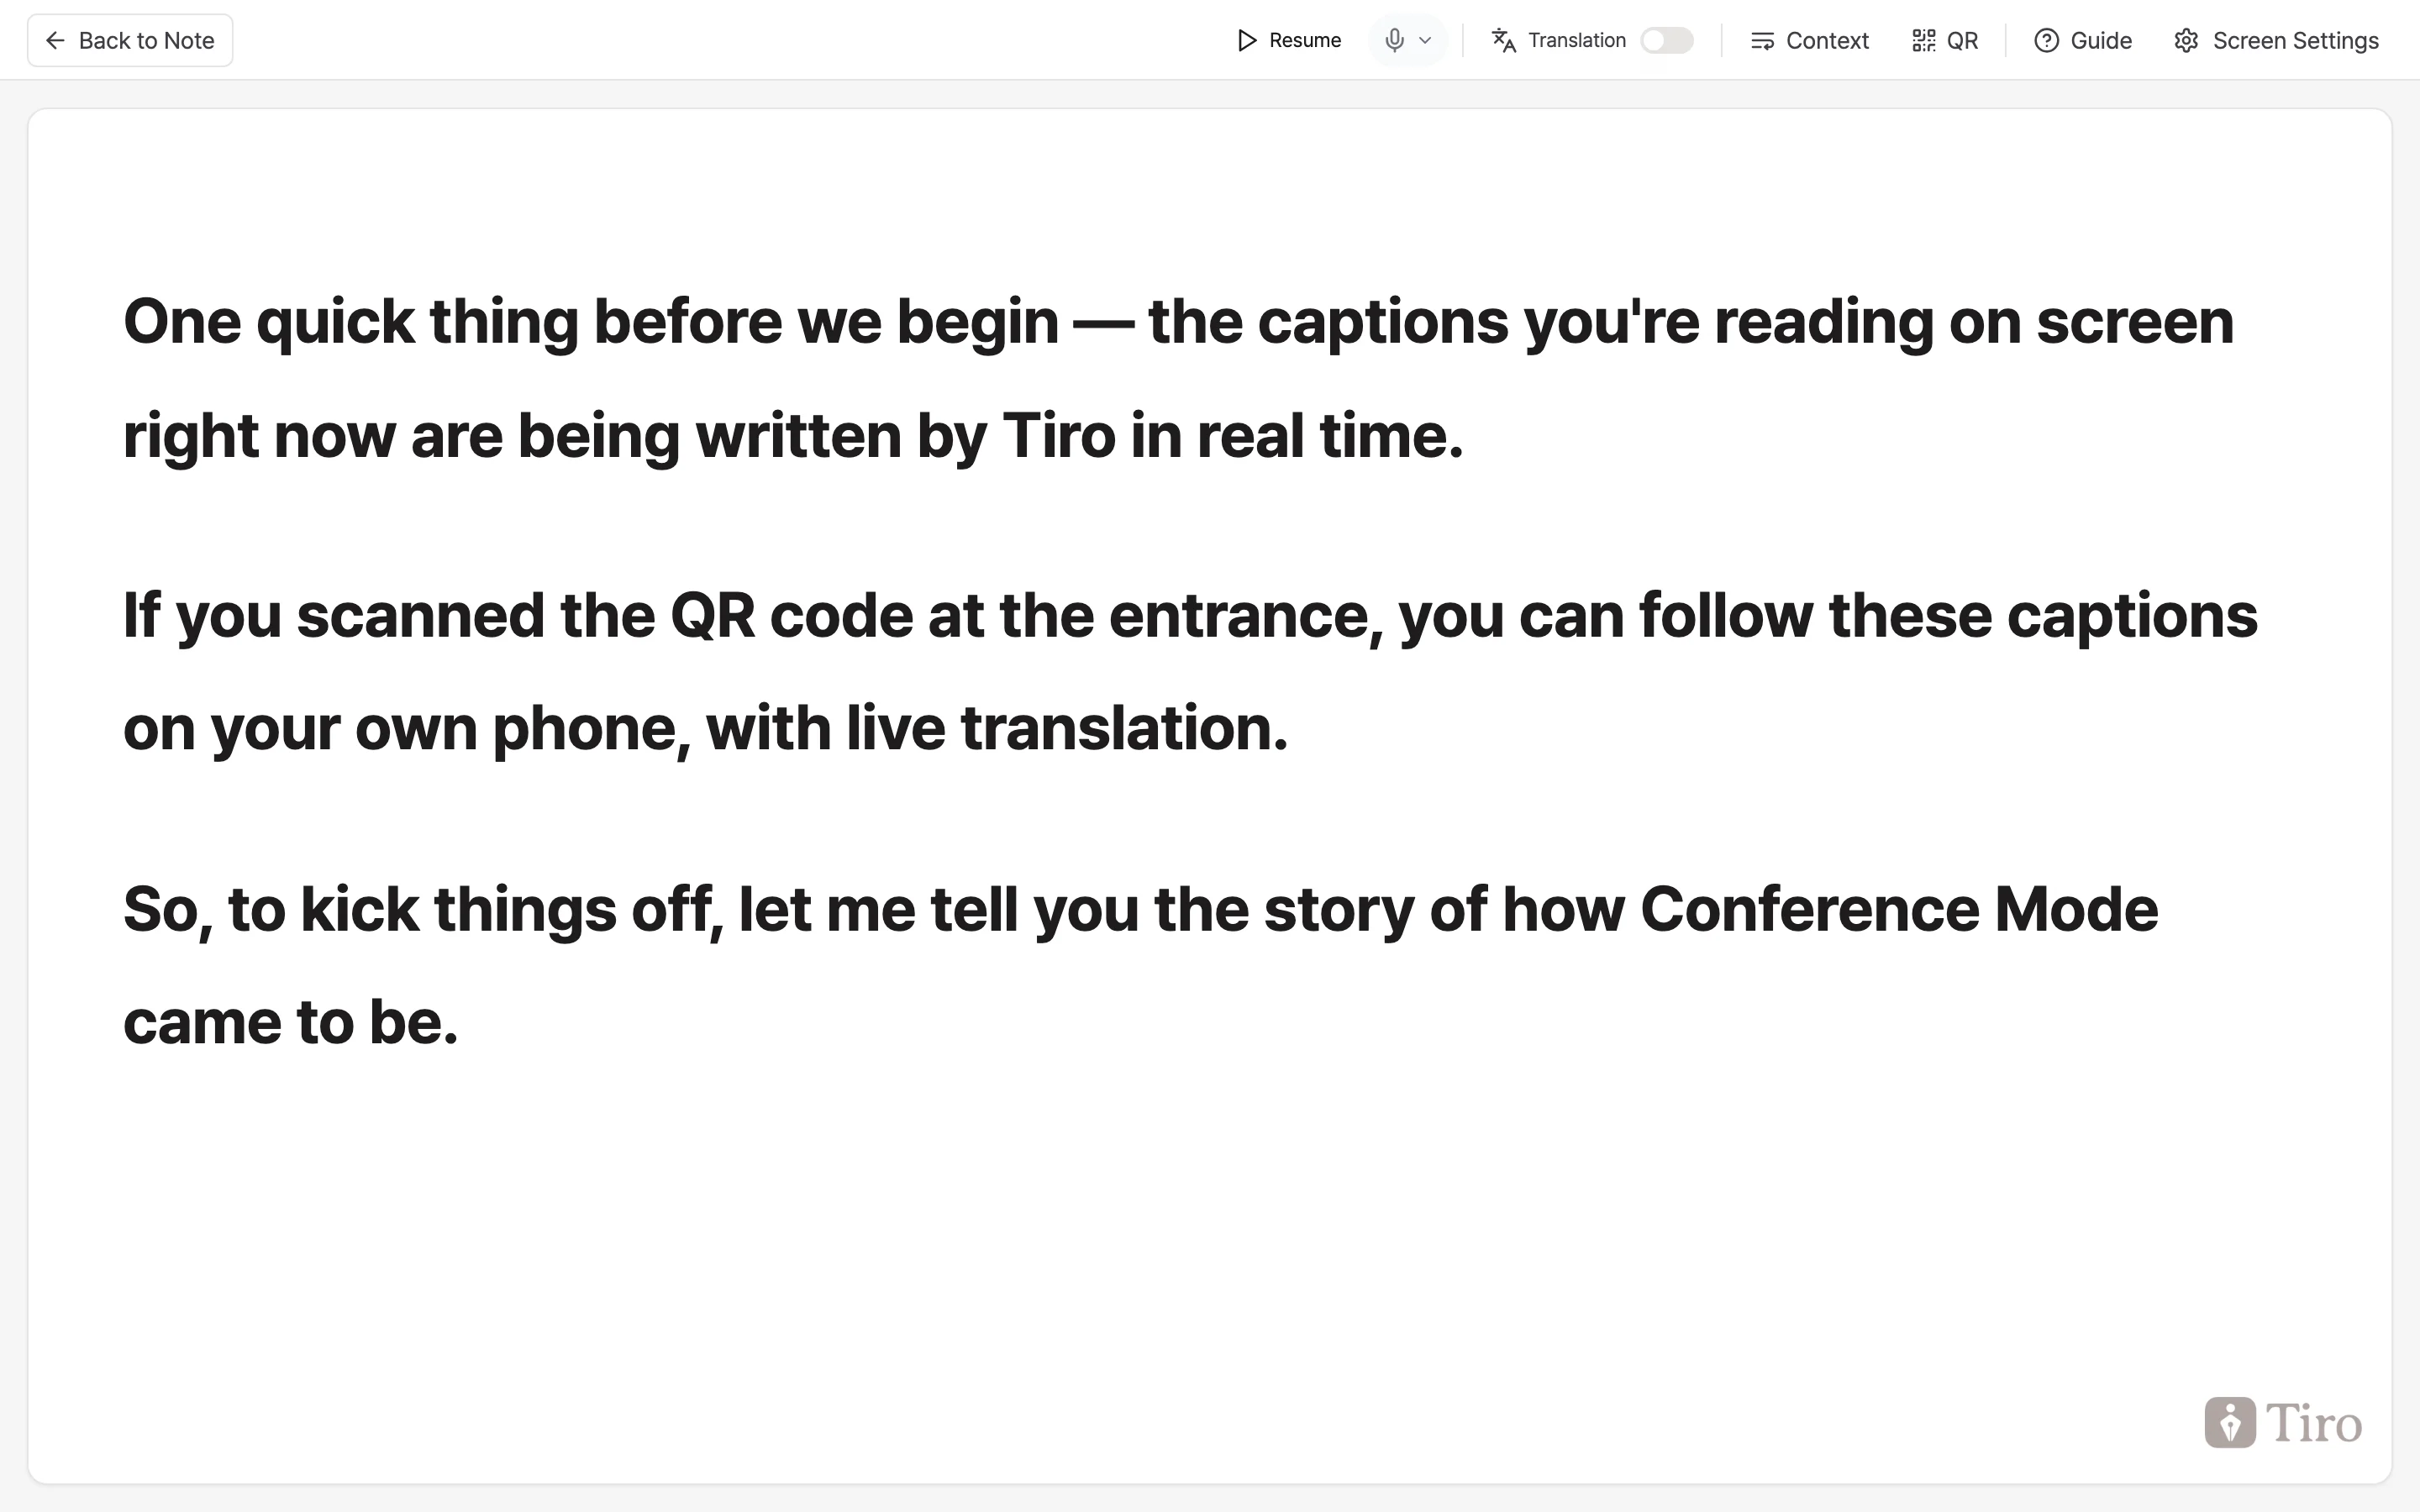
Choose the layout
Adjust the display for your venue from the [Screen Settings] popover at the top. You can change dark mode, font size (75–180%), content width, caption layout (6 options including side-by-side, stacked, and fixed), and whether the header always shows. If this is your first time, the [Guide] button walks you through preparation, audio, display, and troubleshooting.
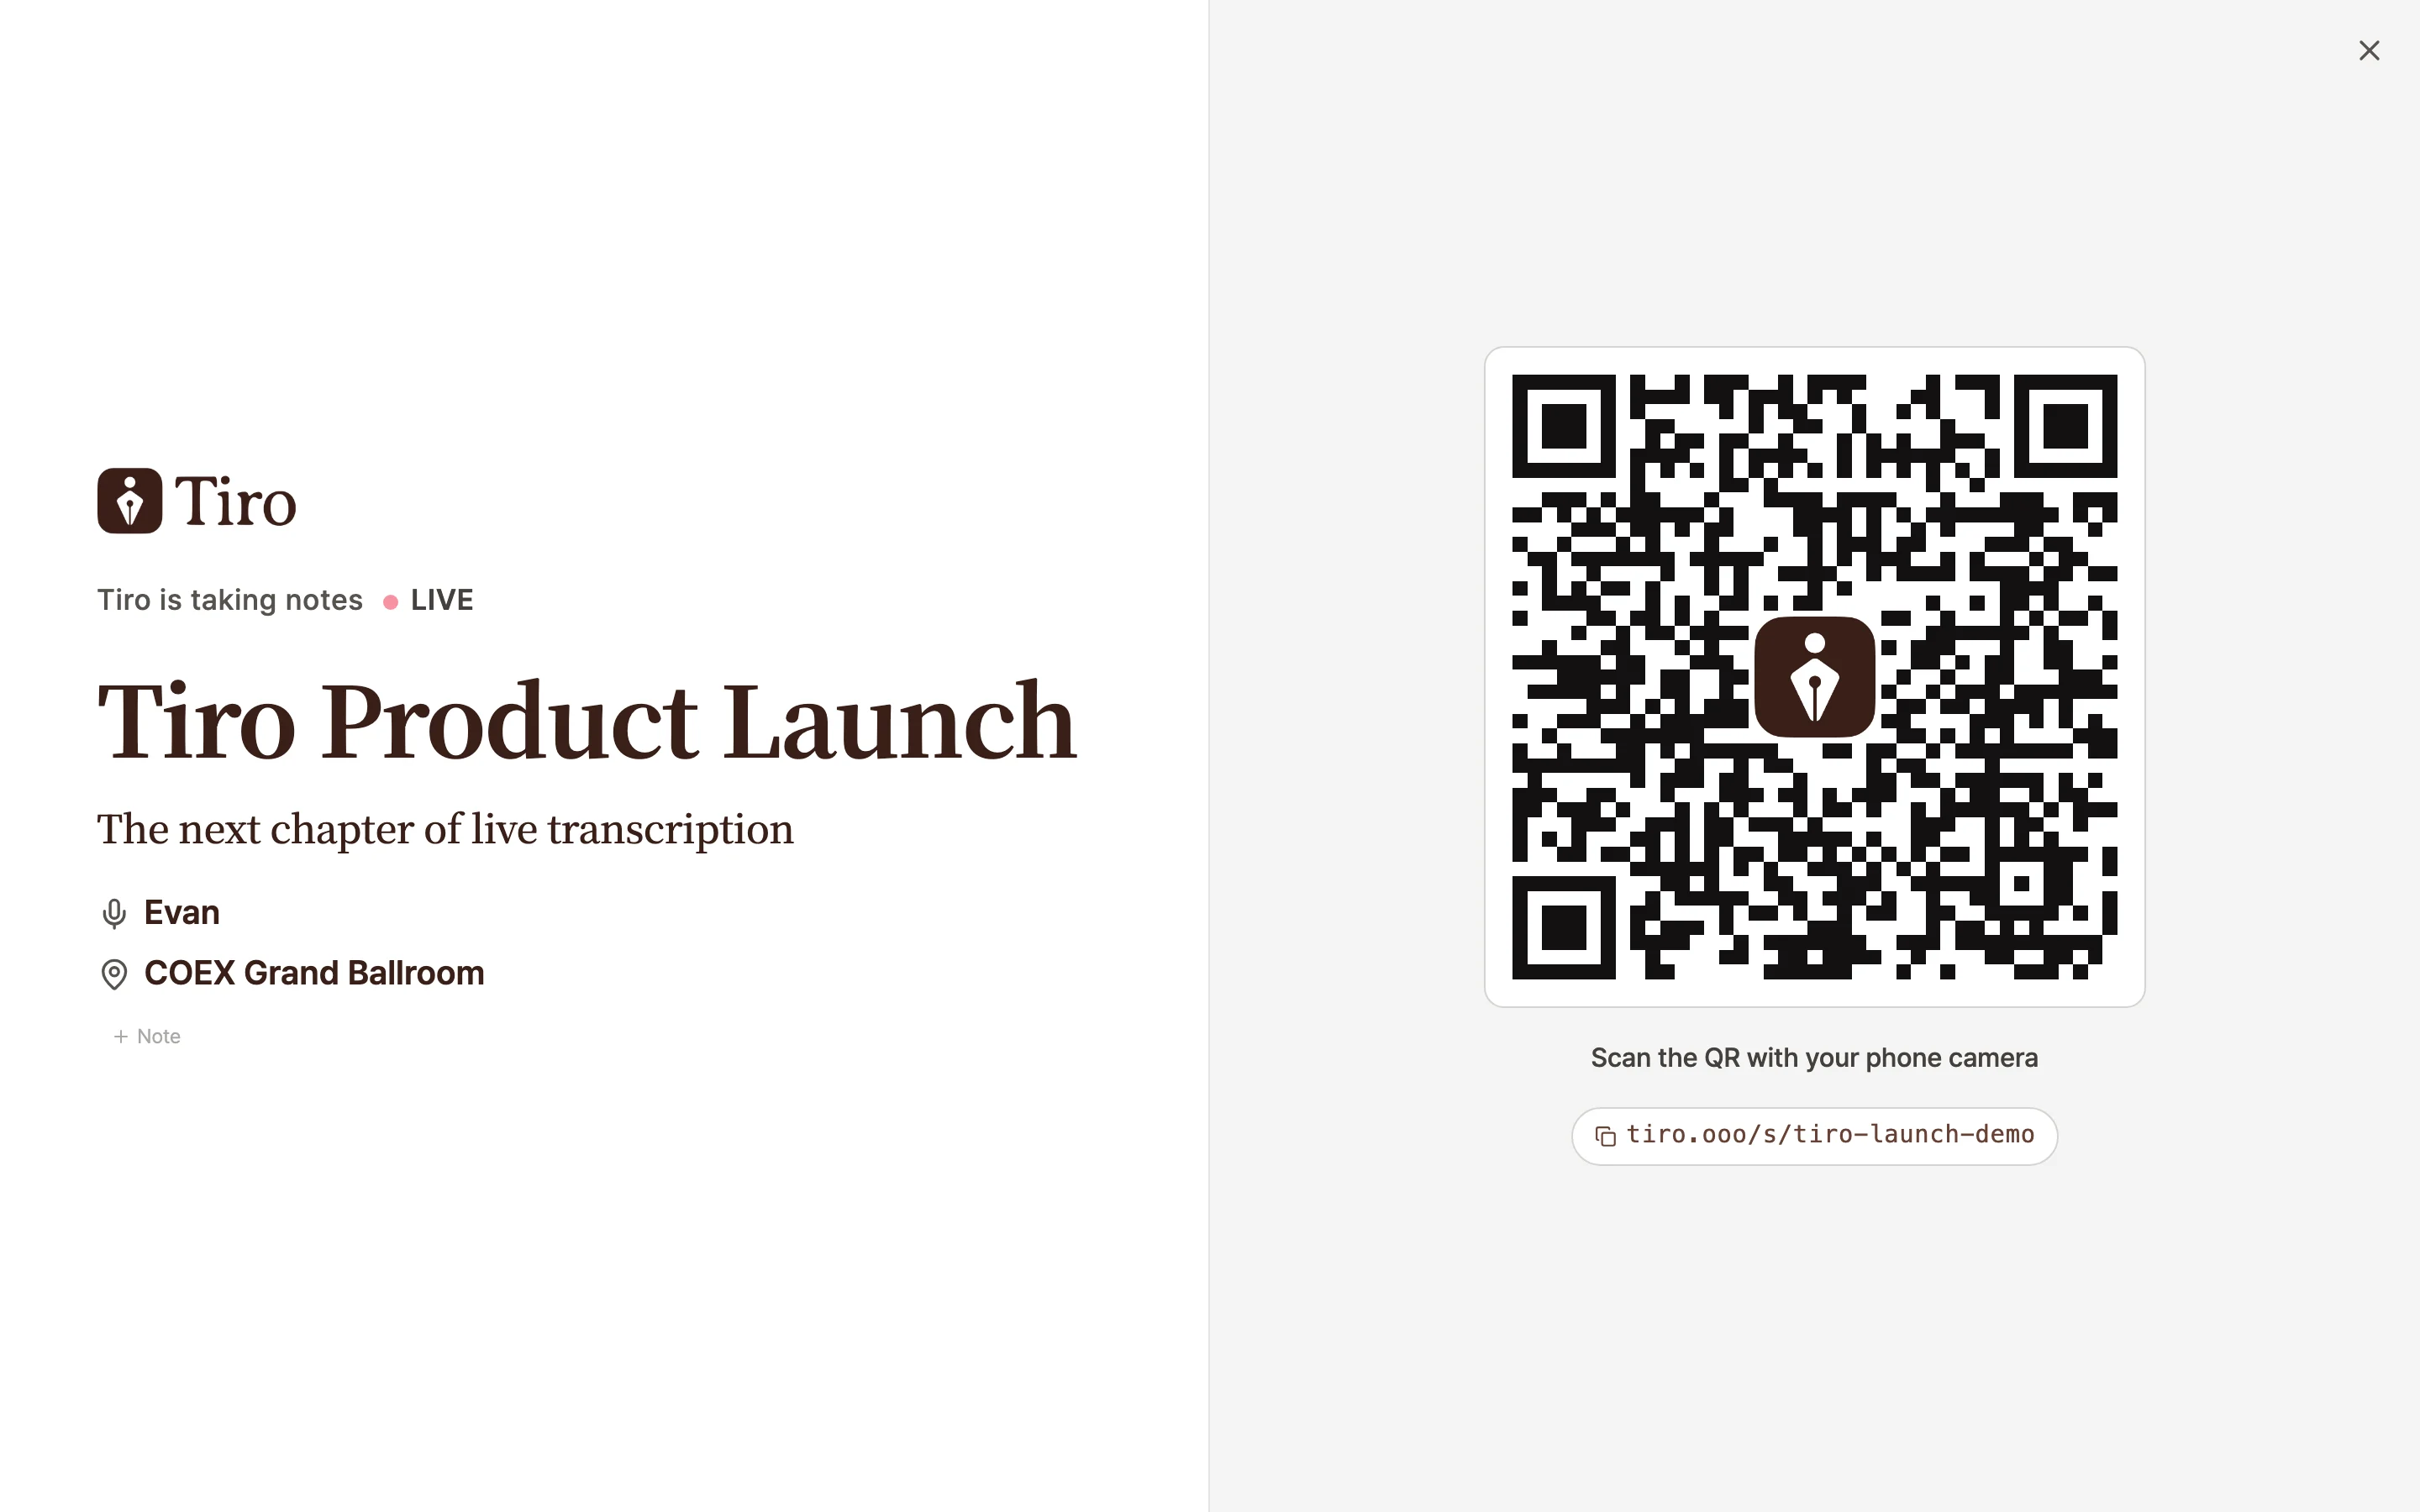
Share captions with the audience via QR
Tap the [QR] button at the top of Conference mode to show a QR code for the audience.- The audience just scans the QR with their phone camera. No sign-in needed.
- Each attendee sees the talk title and date, event details (speaker and venue), and live captions.
- Attendees can adjust dark mode and font size on their own, and toggle translation on and off when the talk has translation enabled.
- Set a password on the link, and only people who enter the password shown on the talk screen can view it.
Show real-time translated captions
Turn on the [Translation] toggle at the top of Conference mode and pick a translation language, and the source captions and translated captions appear together. This helps at events with international attendees. The speaker picks the translation language, and the audience reads the translation in that language.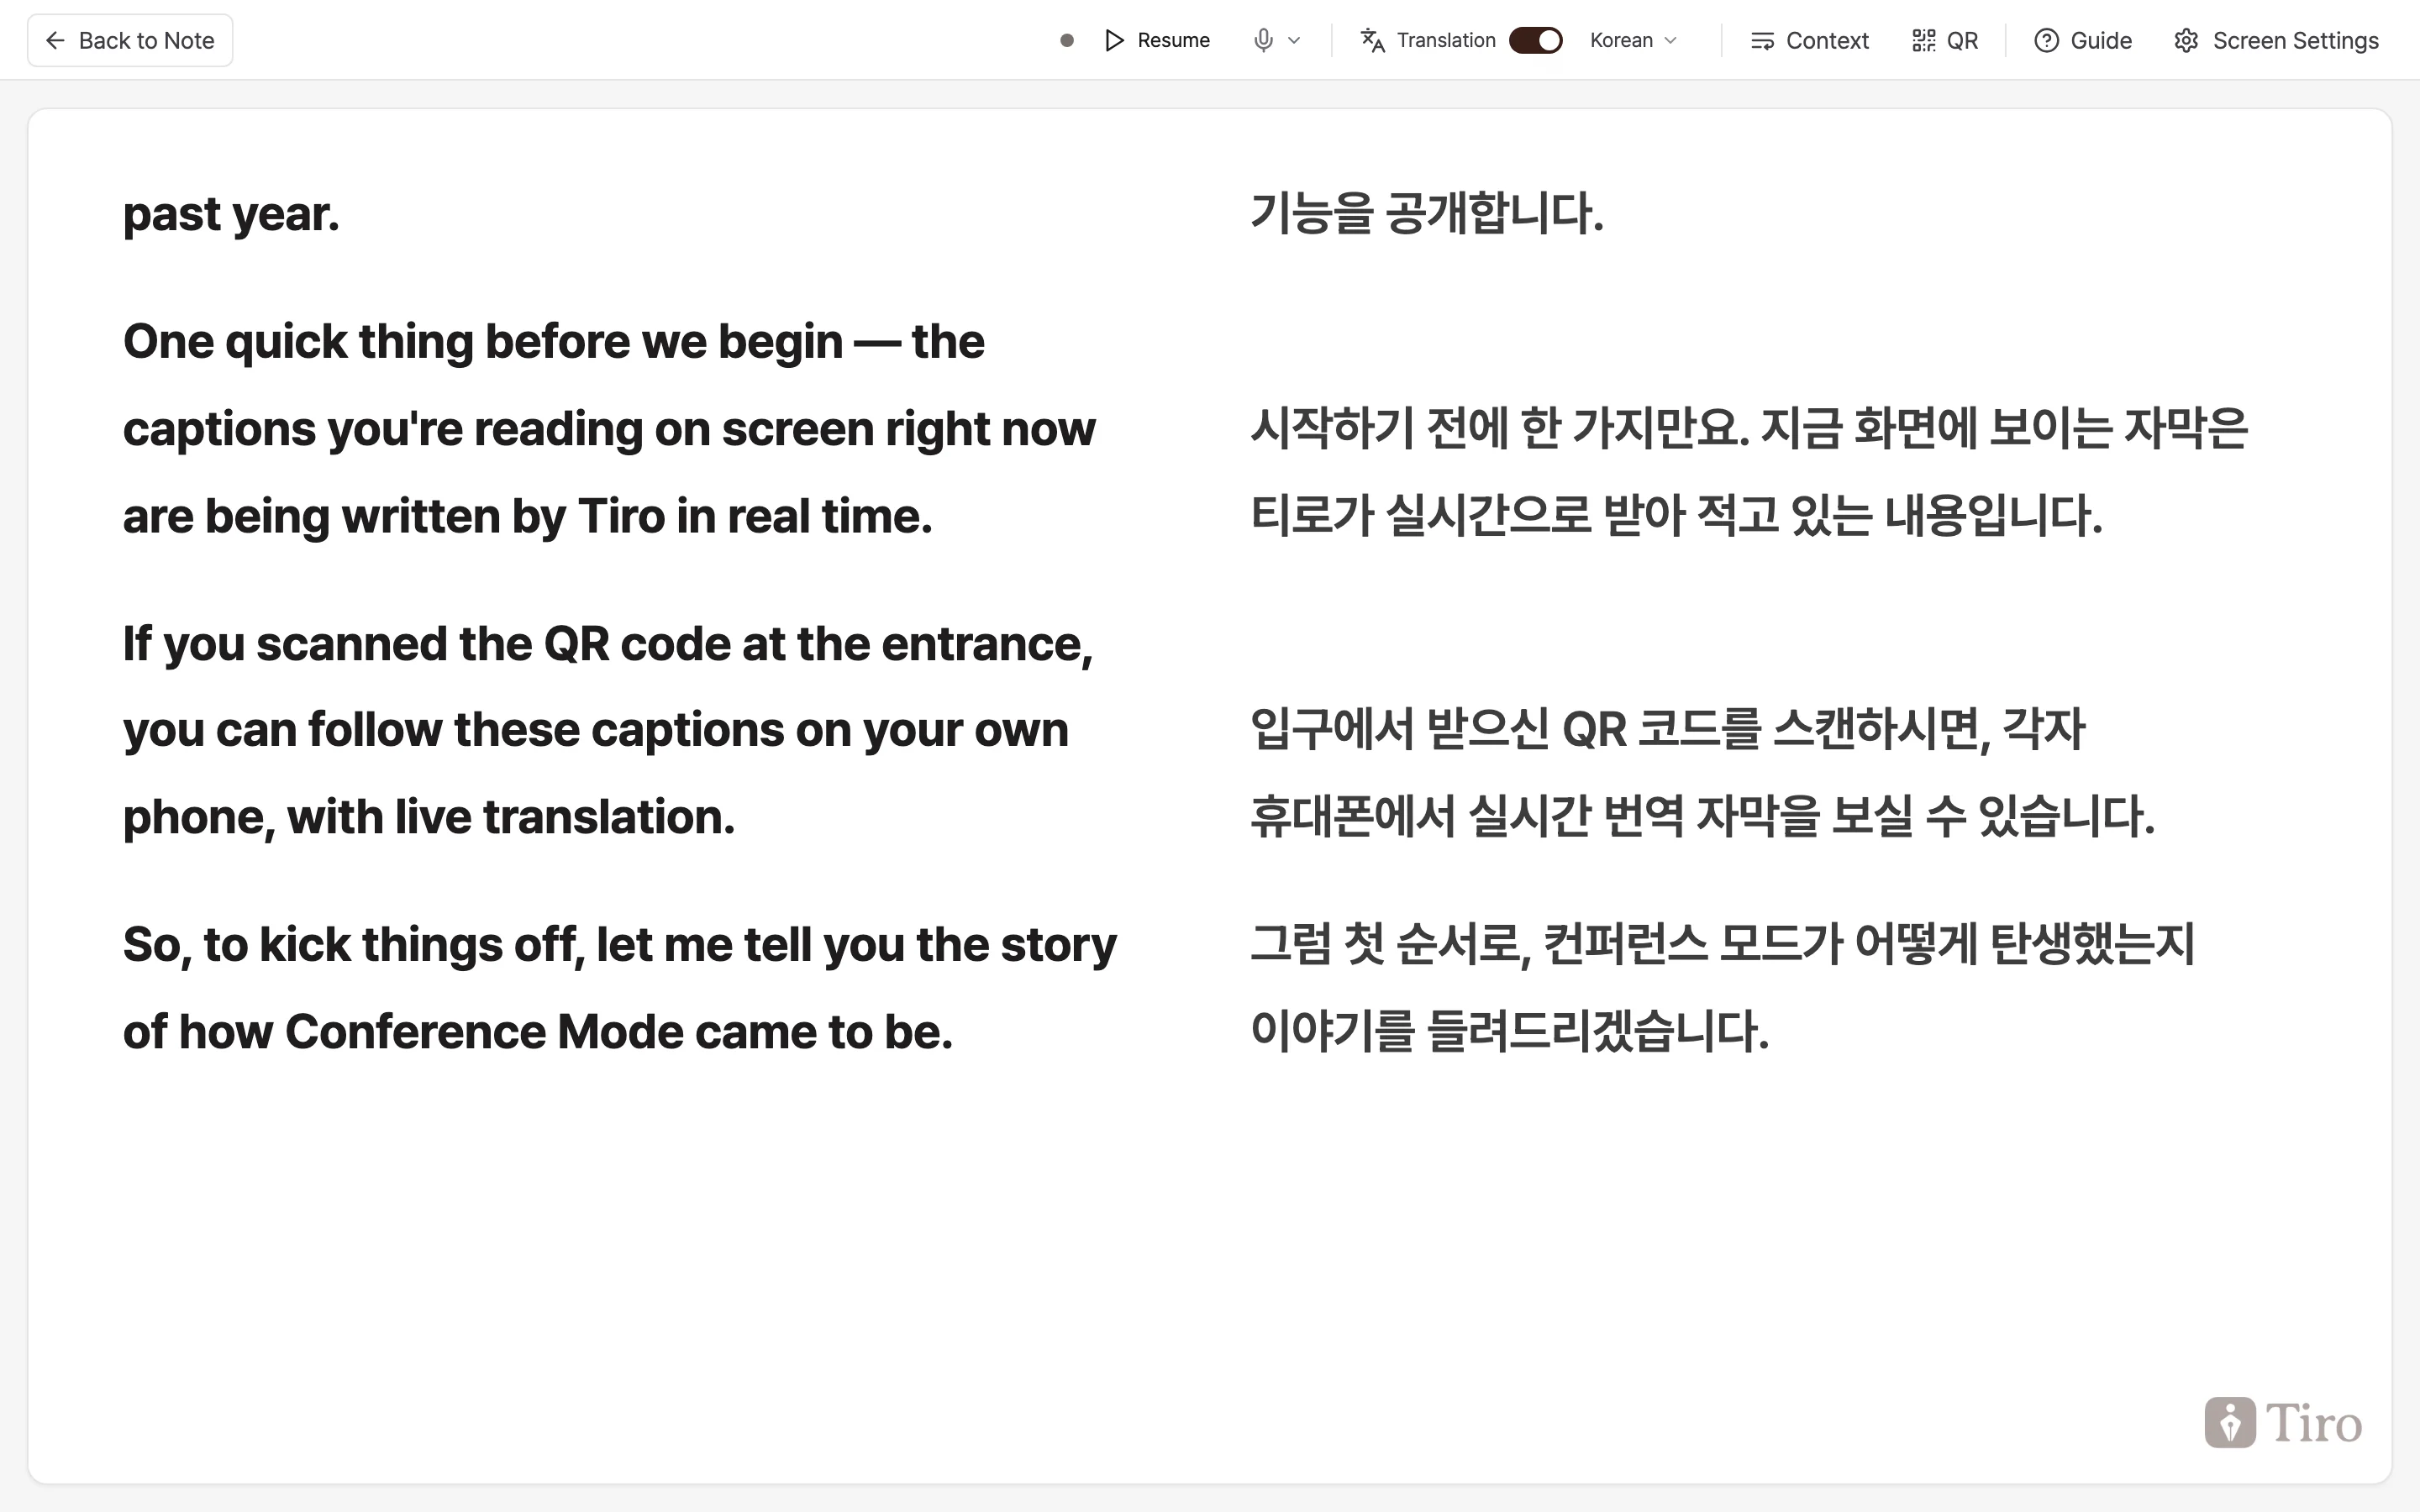
Manage context during the talk
Use the [Context] button at the top to manage the cues that improve caption accuracy, even mid-talk.- Enter the talk topic, proper nouns like people’s and company names, and technical terms, and caption accuracy goes up sharply.
- Beyond text input, you can upload files too (up to 5, each 20MB or less).
- You can also load and reuse context you wrote earlier.
Pre-event checklist
More than half of caption quality comes down to on-site prep. Run through this in order. By the day before- Fill in the event name, speaker, and venue on the note ahead of time. They show up directly in the audience screen header.
- Enter the names and terms that will come up often into context beforehand.
- Check the venue Wi-Fi speed. 10Mbps down and 5Mbps up is stable. Wi-Fi can drop when a crowd gathers, so a wired LAN is the safest.
- Take the talk audio straight into your laptop. Connecting the main mixer’s line out to your laptop through a USB audio interface lifts caption accuracy far above using the built-in mic.
- Pick the screen for captions and check from the back row yourself that the text reads well. Adjust font size and layout in the [Screen Settings] popover.
- Turn off sleep mode and the screen saver on your laptop. If the screen goes dark, the captions stop too.
- Run one test recording to confirm captions write smoothly and auto-scroll.
When the recording ends
When the speaker ends the recording, the screen the audience was watching automatically becomes a regular share page. The audience can reread the full talk transcript from the start at the same link. The speaker’s note keeps the usual one-page document, Note, and transcript.Frequently asked questions
The Conference mode button is disabled.
Check three conditions: that it’s a live recording note (file-upload notes don’t qualify), that the [Listen In] language is set to [Multilingual], and that the recording is in progress (the button doesn’t appear on a finished note).Do attendees need to sign up for a Tiro account?
No. Scanning the QR shows them the captions right away without signing in. If you’re concerned about public exposure, set a password on the link.Captions keep dropping or lagging.
Check the network first. A wired LAN is the most stable; on Wi-Fi, confirm before the event that you have at least 10Mbps down and 5Mbps up and that it holds even when a crowd gathers.People’s names or company names don’t come out right in the captions.
Before the event, tap the [Context] button and enter the names, terms, and domain expressions that will come up often. The captions track them far more accurately.Can I use it on mobile?
The speaker screen (Conference mode) only turns on from the web and the desktop app. The audience views it by scanning the QR on their phones, so there’s no device restriction.Related pages: Live recording · Context · Sharing